Mazda CX-3: Spare Tire and Tool Storage / Jack
To remove the jack
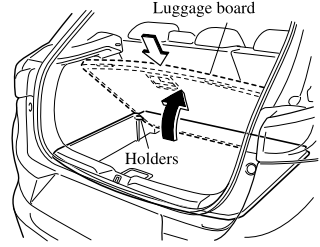
- (With luggage board)
Lift up the luggage board.
- (With luggage board)
Pull the luggage board outward a little and insert the opposite end into the holders so that the luggage board stands.
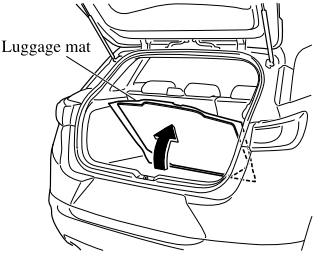
- Lift the luggage mat.
- Remove the cargo sub compartment.
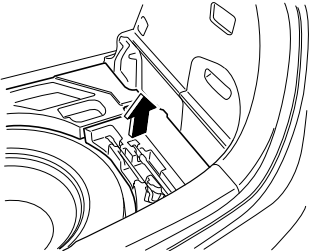
- Remove the cover.
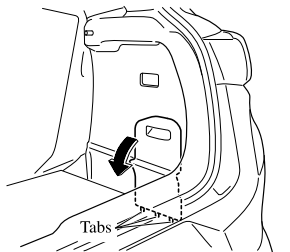
- Turn the wing bolt and jack screw
counterclockwise.
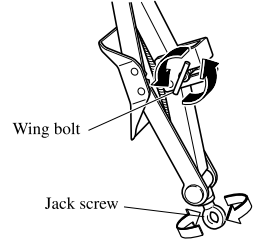
To secure the jack
- Insert the wing bolt into the jack with the jack screw pointing down and turn the wing bolt clockwise to temporarily tighten it.
- Turn the jack screw in the direction
shown in the figure.
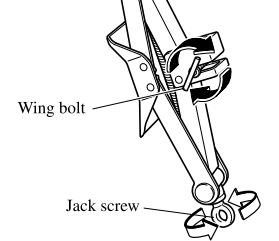
- Turn the wing bolt completely to
secure the jack.
NOTE
If the jack is not completely secured, it could rattle while driving. Make sure the jack screw is sufficiently tightened.
- Insert the cover tabs and install the
cover.
NOTE
Verify that the cover is securely installed.
Maintenance
- Always keep the jack clean.
- Make sure the moving parts are kept free from dirt or rust.
- Make sure the screw thread is adequately lubricated.
 Spare Tire
Your Mazda has a temporary spare tire.
The temporary spare tire is lighter and
smaller than a conventional tire, and is
designed only for emergency use and
should be used only for VERY short
periods...
Other information:
Mazda CX-3 (2015-2026) Owner's Manual: Steps for Determining the Correct Load Limit
Steps for Determining Correct Load Limit- (1) Locate the statement “The combined weight of occupants and cargo should never exceed XXX kg or XXX lbs.” on your vehicle's placard. (2) Determine the combined weight of the driver and passengers that will be riding in your vehicle...
Mazda CX-3 (2015-2026) Owner's Manual: Advanced Keyless Entry System
WARNING Radio waves from the key may affect medical devices such as pacemakers: Before using the key near people who use medical devices, ask the medical device manufacturer or your physician if radio waves from the key will affect the device. The advanced keyless function allows you to lock/unlock the door and the liftgate, or open the liftgate while carrying the key...
Categories
- Manuals Home
- Mazda CX-3 Owners Manual
- Mazda CX-3 Service Manual
- Recommended Oil
- Indicator Lights
- Daytime Running Lights
- New on site
- Most important about car
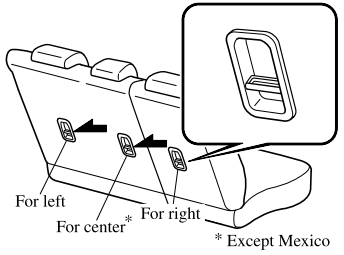
Anchor Bracket
Anchor brackets for securing child-restraint systems are equipped in the vehicle. Locate each anchor position using the illustration.
To install a child-restraint system, remove the head restraint. Always follow the instruction manual accompanying the child-restraint system.
Anchor bracket location
Use the indicated anchor bracket locations when installing a child-restraint system equipped with a tether.
